

Tracing Needle
Tracing needle is an important tool used for design marking in Aari work. Before starting embroidery, the design should be marked correctly on the fabric. This tool helps transfer the pattern neatly so the worker can follow the design lines while stitching. Good marking support is very useful for clean embroidery and balanced design work.
In many embroidery setups, a tracing needle or carbon tool is used along with tracing paper or carbon sheet to move the design onto the fabric. This helps save time and makes it easier to repeat patterns, floral motifs, blouse neck designs, sleeve designs, and other detailed handwork layouts.
What Is a Tracing Needle?
Tracing needle is a useful tool used for design marking in Aari work. Before embroidery starts, the design should be transferred correctly onto the cloth. This tool helps mark the design lines clearly so the worker can follow the pattern while stitching. It is often used as a tracing tool or carbon tool depending on the working method.
Main Use of Tracing Needle
The main use of tracing needle is design marking. It helps transfer blouse designs, floral patterns, border layouts, sleeve motifs, and other embroidery patterns onto the fabric before the actual handwork starts. This is very useful because proper marking gives a clear guide during embroidery.
- Used for design marking before stitching.
- Helps transfer patterns onto fabric.
- Useful for blouse, sleeve, and border designs.
- Supports clean and clear design layout.
- Makes embroidery work easier to follow.
Why Carbon Tool Is Useful
A tracing needle is often used along with carbon paper or tracing sheet. This method helps the design move onto the fabric surface without drawing by hand every time. It is especially useful when the same pattern needs to be repeated many times.
- Helps save time in pattern transfer.
- Useful for repeated embroidery designs.
- Supports better pattern accuracy.
- Easy to use before starting handwork.
- Helpful for both learners and regular workers.
Uses of Tracing Needle in Aari Work
Tracing needle is helpful in many stages before embroidery begins. Good marking makes the work easier and helps keep the final design balanced and neat.
Pattern Marking
Tracing needle helps mark the required design on the fabric before embroidery starts. This makes the work more organized and easy to follow.
Repeated Designs
It is useful for repeated blouse patterns and similar motifs because the same design can be transferred again with better consistency.
Clean Embroidery Guide
Clear marking lines give better direction during stitching. This helps improve design balance and neat embroidery finishing.
Simple Guide to Tracing Needle Use
The table below gives a simple understanding of how tracing needle and carbon tool support design transfer in Aari work.
| Tool | Main Use | Where It Helps | Benefit |
|---|---|---|---|
| Tracing Needle | Design marking | Before embroidery work | Clear pattern guide |
| Carbon Tool | Pattern transfer | With carbon paper or tracing sheet | Easy design transfer |
| Marking Support Tool | Layout preparation | Blouse and design work | Better work planning |
| Repeated Design Helper | Copy same pattern | Multiple embroidery pieces | Saves time and improves accuracy |
Where Tracing Needle Is Useful
Tracing needle is useful in many embroidery situations because correct design marking is one of the first important steps before handwork begins.
Blouse Design Marking
For blouse back neck, sleeve, and border patterns, tracing needle helps move the design neatly onto the fabric. This makes the embroidery process easier and more accurate.
Floral and Motif Layout
Floral motifs and repeated elements need clear placement. Tracing tools help position these designs properly before stitching starts.
Practice and Learning
Beginners learning Aari work can use tracing needle to understand how designs are marked before embroidery. This helps them start with better pattern guidance.
Repeated Pattern Work
When the same design needs to be used on multiple pieces, tracing needle with carbon support helps repeat the pattern more easily and with better consistency.
How to Use Tracing Needle
The design is placed over the fabric with tracing paper or carbon support. Then the tracing needle is used to follow the design lines carefully so the pattern transfers onto the fabric. After marking is complete, the worker can begin embroidery by following the transferred lines.
Clear and balanced marking is very helpful because it supports neat stitch flow and better pattern finishing.
Why This Tool Matters in Aari Work
Tracing needle is an important supporting tool because good embroidery starts with good design marking. If the pattern is marked properly, it becomes easier to complete the design neatly. This helps improve work speed, stitch direction, and the final embroidery appearance.
It is a simple but useful material in any Aari work setup, especially for workers who create custom or repeated patterns.
Frequently Asked Questions About Tracing Needle
These common questions can help users understand how tracing needle is used for design marking in Aari work.
What is a tracing needle used for in Aari work?
Is tracing needle also called a carbon tool?
Why is design marking important before embroidery?
Can tracing needle help with repeated patterns?
Is tracing needle useful for beginners?
Learn More Aari Work Materials
Tracing needle is a useful tool for design marking and pattern transfer before embroidery begins. Understanding how it works can help improve layout preparation, pattern accuracy, and final embroidery quality.
Tracing needle is a simple but very useful tool in embroidery, tailoring, and especially in Aari work and hand designing. It helps transfer designs clearly from paper to fabric without damaging the cloth. Whether you are a beginner or experienced designer, understanding tracing needle details like colour options, size variations, usage methods, and working steps is very important.
What is a Tracing Needle?
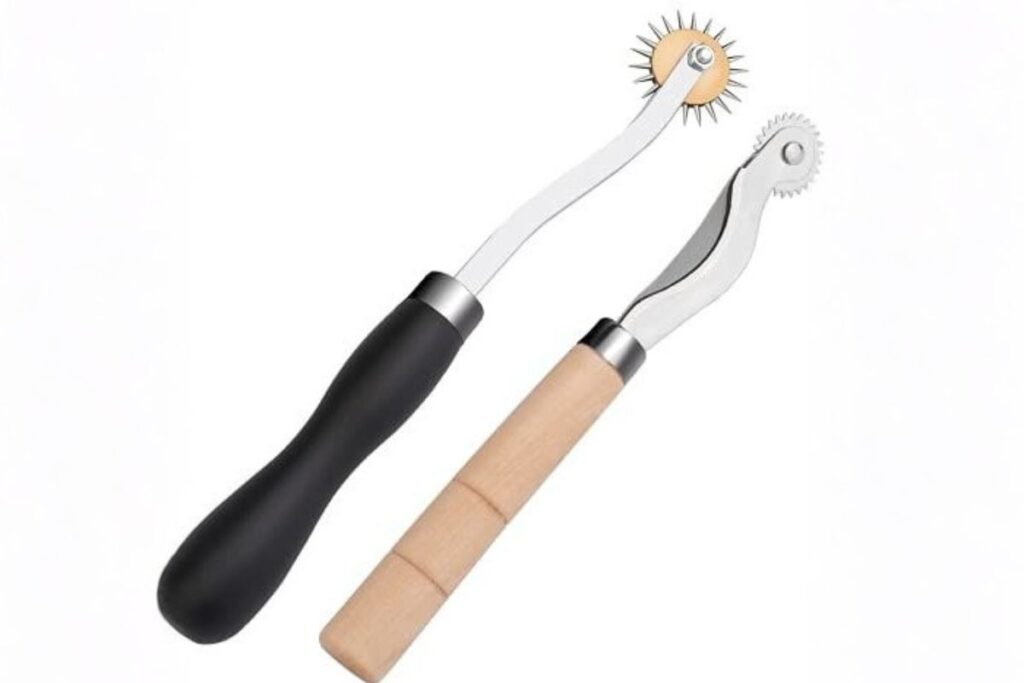
A tracing needle is a sharp, pointed tool used to mark or transfer designs onto fabric. It is usually used along with tracing paper or carbon paper. The needle creates tiny impressions or helps guide colour markings onto the cloth surface. It is commonly used in blouse designing, embroidery work, and pattern making.
Colours Used in Tracing Process
Tracing needles themselves usually come in metal finish, but the colours involved in tracing depend on the materials used along with the needle.
Blue Colour
Mostly used for light-coloured fabrics like white, cream, or pastel shades. It gives clear visibility without staining too much.
Red Colour
Suitable for dark fabrics such as black, navy blue, or deep green. Red stands out well and helps in accurate tracing.
Yellow Colour
Used on medium-dark fabrics where red might not be visible. It gives a soft but clear marking.
White Colour
Perfect for very dark fabrics like black or maroon. White markings are easy to see and guide stitching perfectly.
Black Colour
Used rarely, mainly for very light fabrics where other colours are not suitable.
Choosing the correct colour is important because it ensures the design is visible while working but should also be easy to remove later.
Sizes and Variations of Tracing Needle
Tracing needles are available in different sizes and types depending on the work requirement.
Fine Tip Needle
This has a very sharp and thin point. It is used for detailed and intricate designs like floral patterns, Aari work motifs, and small curves.
Medium Tip Needle
This is the most commonly used size. It is suitable for general tracing work, blouse designs, and standard embroidery patterns.
Thick Tip Needle
Used for bold designs or when working on thick fabrics like silk, velvet, or layered materials.
Single Needle Tool
A simple single-point needle used for precise tracing.
Multi-Needle Tool
Some tracing tools come with multiple points to create dotted lines quickly. These are useful for large designs.
Wooden Handle Needle
Easier to hold and gives better grip for long working hours.
Metal Handle Needle
Durable and strong, mostly used by professionals.
Selecting the right size depends on the design complexity and fabric thickness.
Usage of Tracing Needle
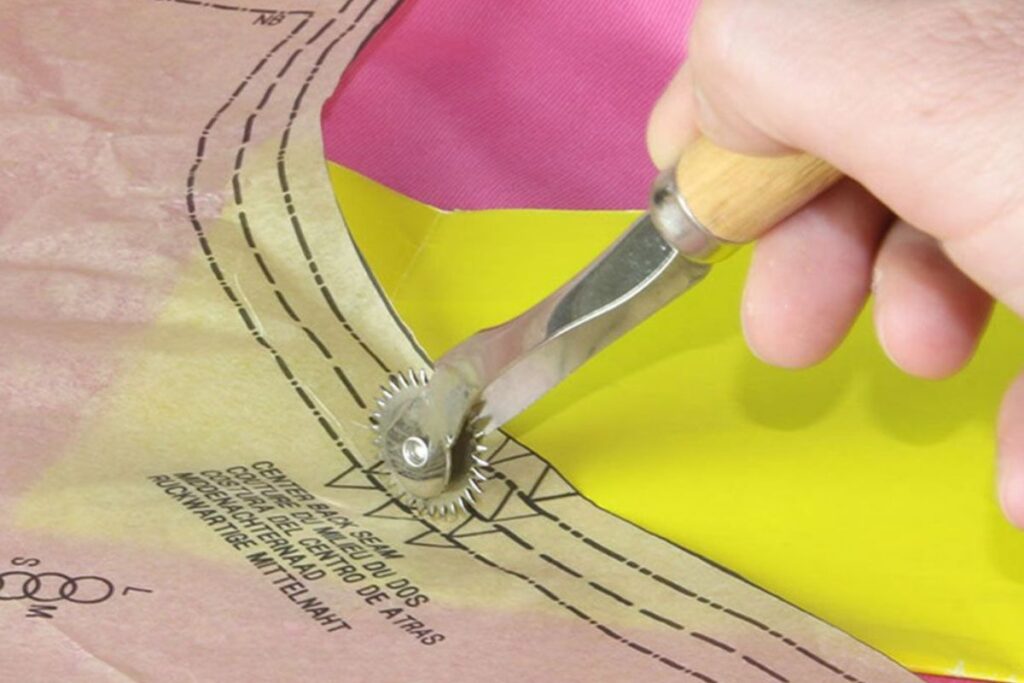
Tracing needle is widely used in different areas of textile and design work.
Aari Work Blouse Design
Used to transfer intricate embroidery patterns onto fabric before stitching.
Hand Embroidery
Helps mark the design clearly so that stitches follow the exact pattern.
Tailoring and Pattern Making
Used to mark cutting lines, darts, and design outlines.
Fashion Designing
Designers use tracing needles to place patterns accurately on fabric.
Craft and DIY Projects
Useful in fabric painting, quilting, and decorative works.
Saree and Lehenga Designing
Helps transfer heavy design motifs onto large fabric surfaces.
Une fois découvert, lira spin app a tendance à fidéliser durablement ses visiteurs. Les retraits sont traités sous 24 heures dans la majorité des cas, parfois en quelques minutes seulement. L’écoute des retours utilisateurs nourrit régulièrement les évolutions de la plateforme. Les machines à sous représentent l’essentiel de l’offre, avec des milliers de variantes thématiques. Les transactions sont contrôlées par un système anti-fraude en temps réel. Le site s’adapte automatiquement à la taille de l’écran pour conserver lisibilité et confort. Les limites de mise sur les tables live s’adaptent aussi bien aux petits joueurs qu’aux high rollers. L’inscription est rapide et ne nécessite que quelques étapes simples pour commencer à jouer. Les bonus sans condition de mise sont proposés ponctuellement, offrant une liberté totale aux joueurs. Le blog de la plateforme propose des articles informatifs sur les stratégies de jeu et les tendances du secteur. Les opérations en euros se déroulent sans frais de change ni surcoût caché. L’assistance francophone est disponible 24 heures sur 24 par chat en direct. L’offre de jeux est segmentée en catégories claires pour faciliter la navigation des nouveaux venus. La plateforme publie régulièrement des rapports de transparence sur les taux de redistribution de ses jeux. L’interface mobile a été conçue dès l’origine pour offrir une expérience fluide sur smartphones et tablettes. Le studio de jeu en direct fonctionne sans interruption avec des équipes qui se relaient. Le tableau de bord personnel centralise l’historique de jeu, les bonus et les transactions. Les récompenses d’anniversaire ajoutent une touche personnelle appréciée par la communauté. L’écosystème complet répond aux attentes des joueurs occasionnels comme des plus aguerris. Les dépôts sont crédités instantanément, permettant de commencer à jouer sans aucun temps d’attente. Les guides pas-à-pas mis à disposition aident les nouveaux venus à découvrir l’écosystème. Cette proposition s’impose progressivement comme une référence solide du jeu francophone. L’expérience laisse une impression positive durable, signe d’un travail de fond réussi.
Materials Required for Tracing
To use a tracing needle properly, you need a few supporting materials:
- Fabric (blouse piece, cotton, silk, etc.)
- Design paper or printed design
- Carbon paper or tracing paper
- Tracing needle
- Tape or pins (to hold materials in place)
- Flat working surface
Having all materials ready makes the process smooth and accurate.
Why Tracing Needle is Important in Aari Work
In Aari work, design accuracy is very important. Even a small mistake can affect the final look. Tracing needle helps in:
- Maintaining symmetry in designs
- Achieving fine detailing
- Guiding thread work correctly
- Reducing design errors
- Improving finishing quality
Variations in Tracing Techniques
Direct Needle Tracing
Using only needle without carbon paper to create dotted impressions.
Carbon Tracing Method
Most common method using carbon paper for visible markings.
Chalk Tracing Method
Using chalk powder along with needle impressions.
Perforation Method
Creating tiny holes in design paper and dusting powder to transfer design.
Each method has its own use depending on the design and fabric.
Where Tracing Needle is Most Useful
- Bridal blouse designing
- Party wear blouse patterns
- Heavy embroidery works
- Boutique tailoring work
- Custom fashion designing
- Professional embroidery setups
Step-by-Step Process to Use Tracing Needle
Follow these steps to get perfect tracing results:
Step 1: Prepare the Fabric
Spread the fabric on a flat surface. Make sure it is clean, wrinkle-free, and properly aligned.
Step 2: Place Carbon Paper
Keep the carbon paper on top of the fabric. The coloured side should face the fabric.
Step 3: Position the Design Paper
Place the design sheet over the carbon paper. Adjust it properly according to the placement needed.
Step 4: Fix the Layers
Use tape or pins to hold the fabric, carbon paper, and design sheet in place. This prevents shifting while tracing.
Step 5: Start Tracing
Use the tracing needle to gently follow the design lines. Apply even pressure so the design transfers clearly.
Step 6: Check the Design
Carefully lift one side and check if the design is properly transferred. If not, trace again lightly.
Step 7: Remove Papers
Once done, remove the design paper and carbon paper slowly.
Step 8: Final Touch
If needed, go over the lines with a fabric pen or chalk for better visibility.
Maintenance of Tracing Needle
Taking care of your tracing needle increases its life and performance.
- Clean the needle after every use
- Store in a dry place to avoid rust
- Keep it covered to maintain sharpness
- Do not drop or bend the needle
- Replace if the tip becomes dull
Proper maintenance ensures smooth and accurate tracing every time.
Advantages of Using Tracing Needle
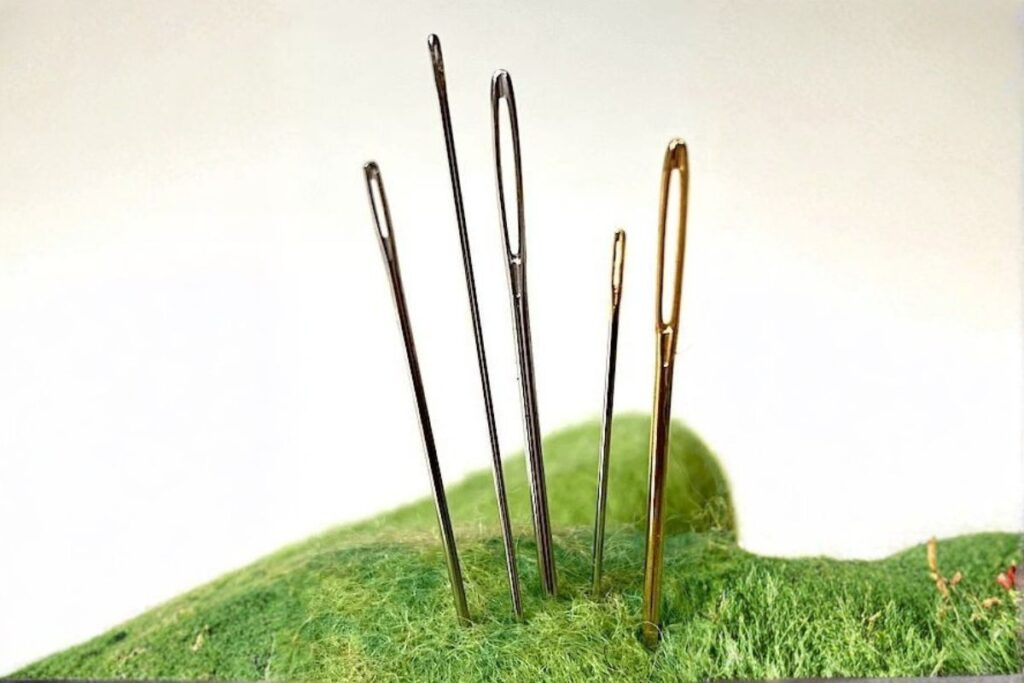
- Gives precise and clean design transfer
- Suitable for all types of fabrics
- Easy to use for beginners
- Helps maintain design accuracy
- Saves time compared to freehand drawing
- Works well for both small and large designs
Common Mistakes to Avoid
- Using the wrong colour carbon paper
- Applying too much pressure and tearing fabric
- Not fixing the layers properly
- Tracing on uneven surfaces
- Skipping small details in the design
- Using a blunt or damaged needle
Avoiding these mistakes helps achieve neat and professional results.
Tips for Better Tracing Results
- Always use a sharp needle for clean lines
- Do not press too hard to avoid fabric damage
- Choose the correct colour based on fabric shade
- Work on a hard and flat surface
- Keep your hand steady while tracing
- Test on a small fabric piece before starting
- Avoid folding or moving the fabric during tracing